How to install indicators on Tradestation
Use these video tutorials as your quick guides to the complete installation of a study on Tradestation.
Installation Videos
Tradestation 10
Tradestation 9.5
What to do before downloading your indicators
If you just purchased the indicator you will need to have your Tradestation customer number available so you can authorize it for use.

Step 1: Find your Tradestation customer number
From the Tradestation application, go to HELP > About Tradestation
If you just purchased the indicator you will need to have your Tradestation customer number available so you can authorize it for use.
Step 2: Copy your Tradestation customer number
This is the number you will need to authorize your indicator after you download the installer. The picture on the left shows the Tradestation 10 About window, and the picture on the right – About window in Tradestation 9.5.


In just a few short steps outlined below, you will have your indicator on your chart and be ready to start trading.
Step 3: Download The Indicator File
From the Simpler website:
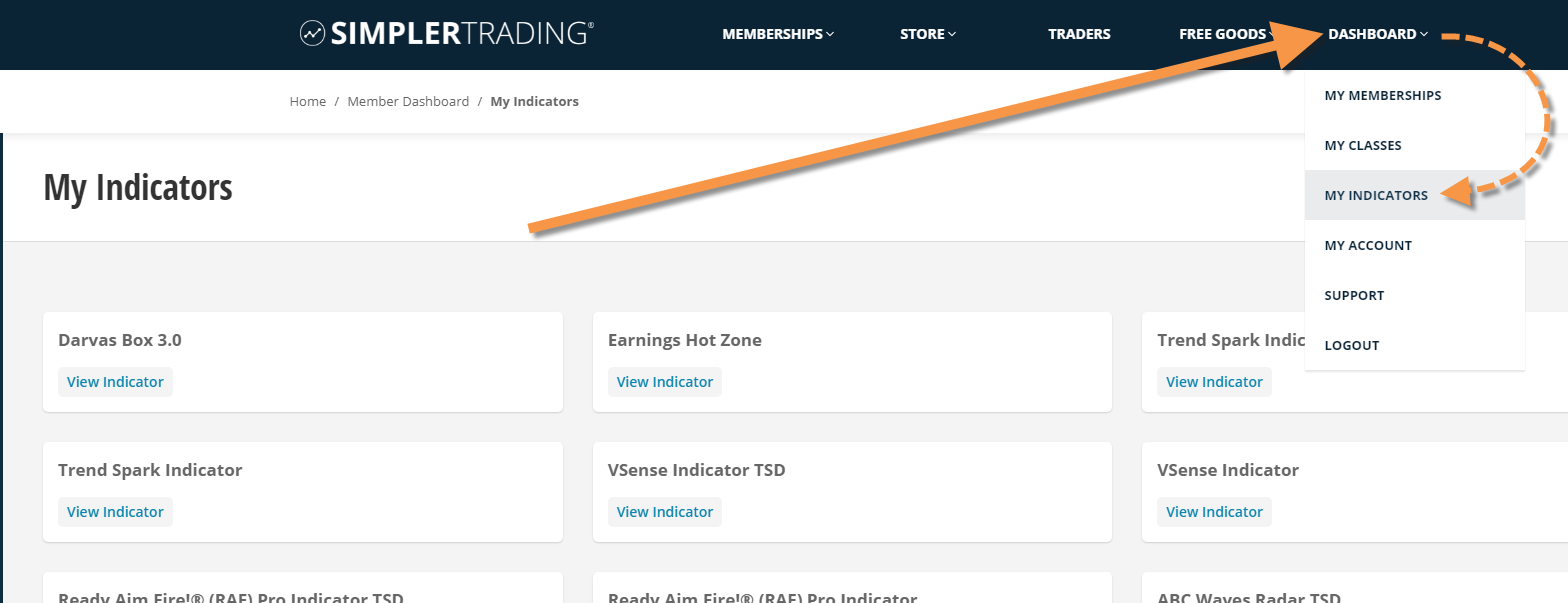
Login to www.simplertrading.com -> Hover over Dashboard -> Click on My Indicators.
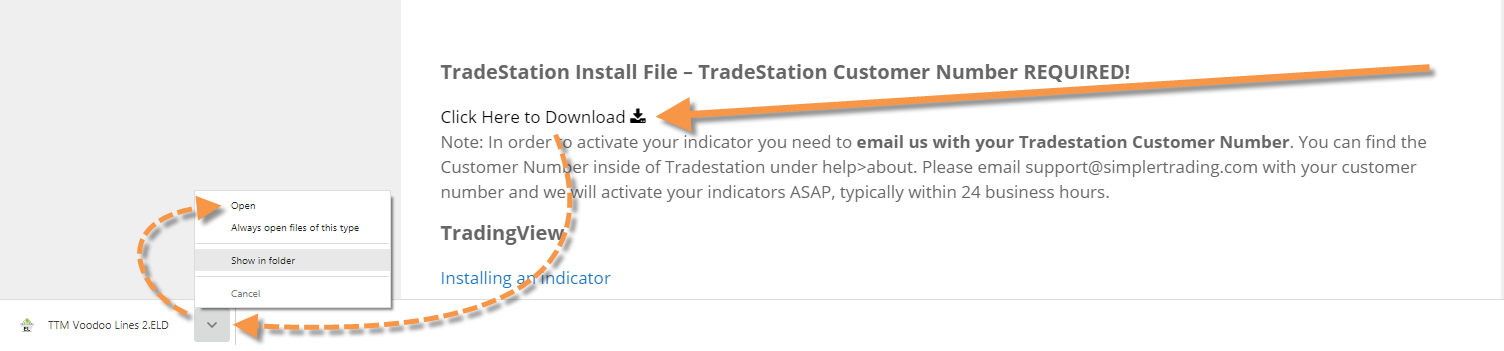
Step 4: Enter your customer number:
Find the text box on the download page shown under “Tradestation”. Left-click inside the text entry box and enter your Tradestation customer number from Steps 1 and 2.

Type or paste your customer number into the text entry field.

Step 5: Click on the link to download the installer file

The name of the indicator will appear in the lower-left corner of your browser window.
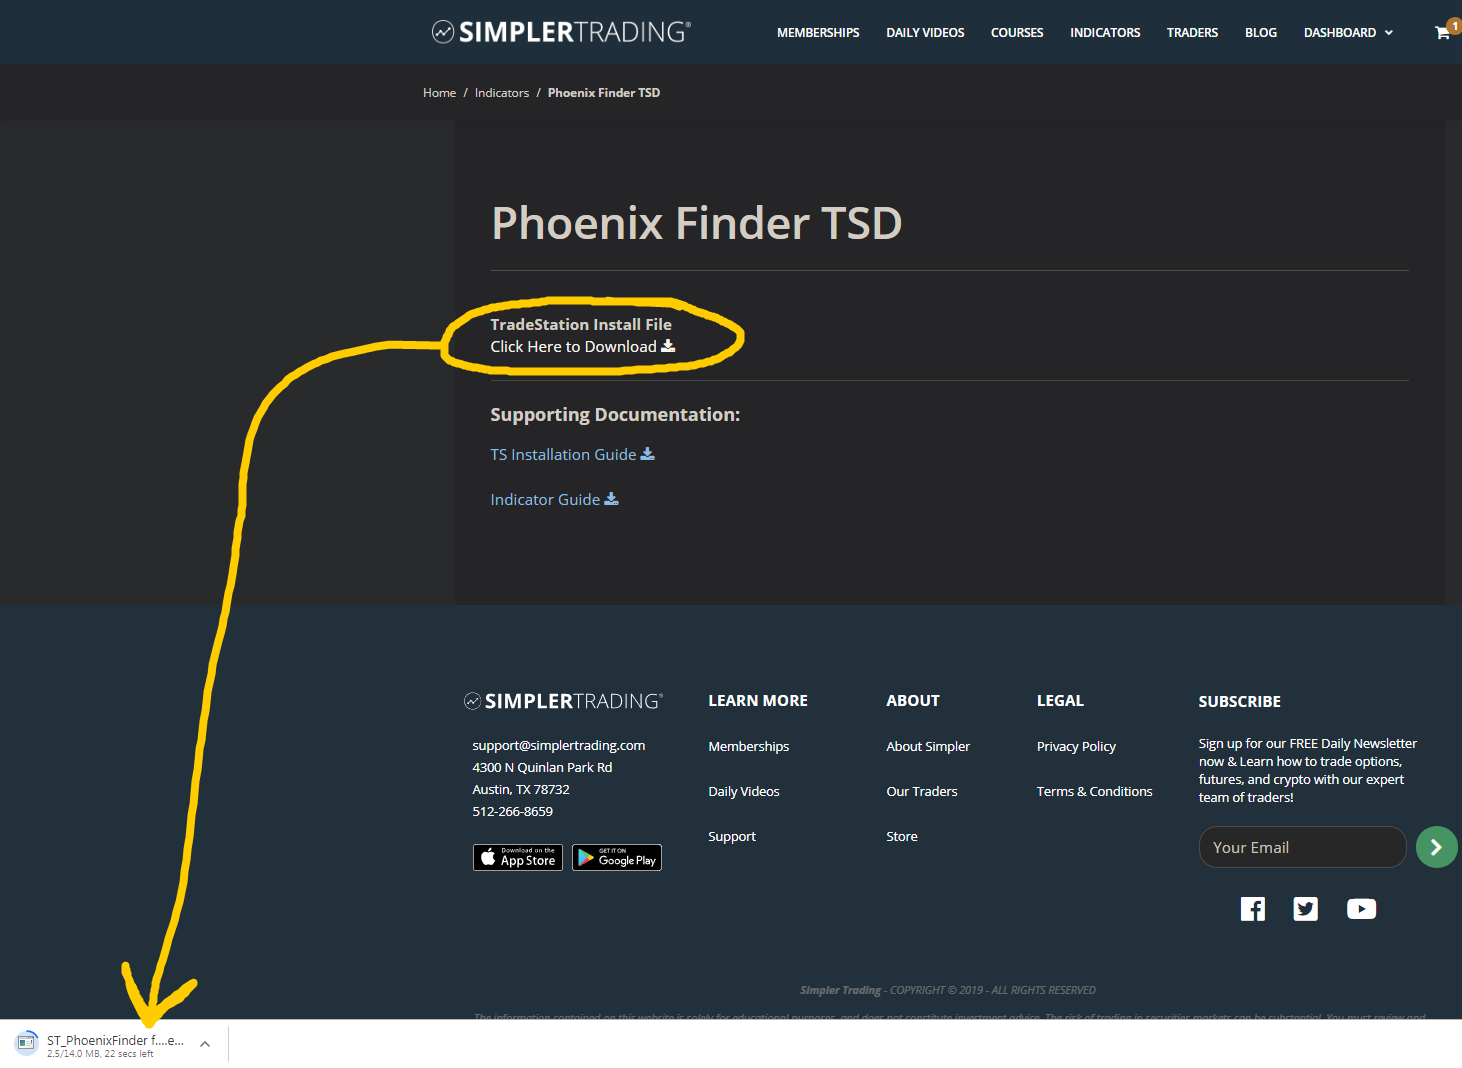
Left-click on the icon next to the name of the indicator file.

From the drop-down menu, left-click on Open.
Step 6: Open Install Wizard
The installer will run after you click on Open.
You can also find the installer in your download folder. Double-click on the file, or right-click and choose Open.

Step 6. Next, you will complete the installation process
Once you have run the indicator file, you should see the Install Wizard window appear to walk you through the installation. Click through the installation steps to complete the indicator install.
Select Run…

Follow the prompts to complete the installation from the install wizard.
Step 7: Add the indicator to your chart
Go to Studies -> Add Study

Choose the appropriate category from the left column. This study’s category is an indicator.
From the list on the right, find the name of the indicator, highlight it by left-clicking on it once, and click OK.
Note that some studies may be part of a different category. For instance, the GRaB candles have 2 parts, it is a PaintBar study and an Indicator study.
* If you have an updated version of an indicator and you want to make sure that the correct version loads up on your charts follow our guide here on how to uninstall the old version of an indicator first.
* If you have installed your indicator but it does not show on your charts, read how to fix the problem here.

———————————————————————–
An alternative way to add indicators to your chart
After your indicator is installed into Tradestation, you can put an indicator on a chart by opening the workspace that came with the indicator. Opening the workspace will add the indicator to the chart with pre-set settings. This is a good way to see the indicator for the first time if you are not sure how it should look.

The file path to get to the indicator will be:Computer > Main (C:) > Program Files (x86) > SimplerTrading > ST_NameOfIndicator for Tradestation.
Here is a helpful video walking you through opening an indicator’s workspace.